Setting up the Arduino Uno for Your First Experiment Using a Mac
For the curious beginner, this article is a quick introduction to the world of the Arduino Uno and the Ultrasonic Range module HC-SR04.


A few days ago, I was pondering about how aerial drones could have been so useful during Covid - for delivering groceries, checking on people in isolation in their homes and so on.
The main challenge for these drones is to autonomously navigate through obstacles and accurately deliver the package to the designated location.
Bats can do this easily - masterfully navigating their surroundings, effortlessly employing ultrasound echos to evade obstacles, and their brains, perhaps guided by a form of "GPS", enable them to pinpoint the precise locations of their favorite haunts.
I aimed to explore the feasibility of creating a drone with similar capabilities.
When selecting the "brain" for the drone, I had two options.
Arduino
Raspberry Pi.
The Raspberry Pi is like a small computer, but I did not need most of its functionalities.
I decided to use the Arduino because it is cheaper and it allows you to control things at a lower level (i.e. at a level closer to the hardware).
The Arduino is a microcontroller board, and it is often used for various projects to control electronic devices or interact with the physical world.
So I took out the Arduino Uno that was sitting in my attic.
In the beginning, I was apprehensive I might damage the Arduino Uno somehow - for example, by short circuiting something.
But I discovered it is so easy to get started with the Arduino Uno.
How easy?
You can get it up and running in less than 20 minutes if you follow the steps below.
I used a Mac, but you can find the same Arduino IDE for Windows or Linux.
First step: Install the Arduino IDE.
Go to https://www.arduino.cc
Under the Software tab, you can download the Arduino IDE for Mac, Windows or Linux.
After you have downloaded, double click to install.
Second step: Write your first code on the IDE
When you open the Ardiuno App, you will be greeted with an example program that is empty.
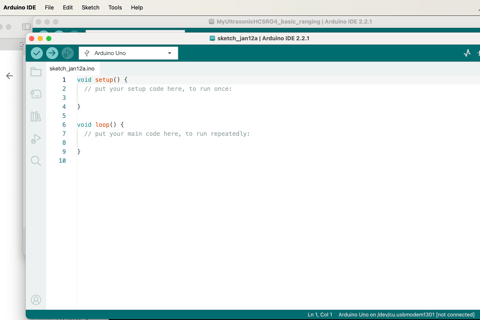
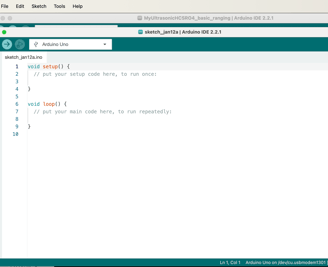
There are two functions, setup() and loop().
Anything written in setup() will be run only once. Any code written inside loop() will be run in a loop as the name suggests.
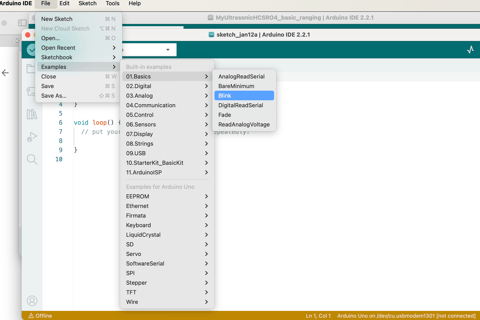
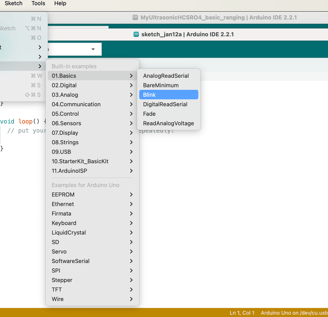
Try an example code. Click on File -> Examples -> Basic -> Blink.


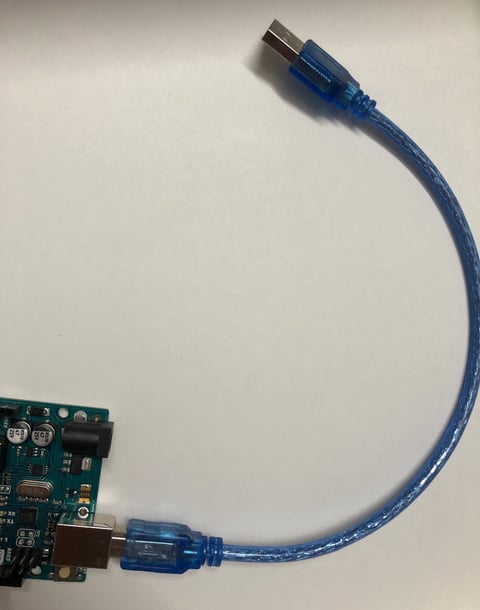
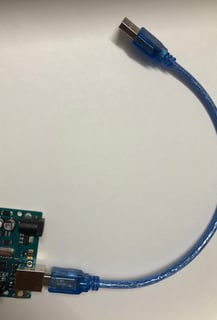
Use the USB end of the cable to connect the Arduino to your Macbook.
When you connect the Arduino to the Mac, you will start seeing some lights blinking.
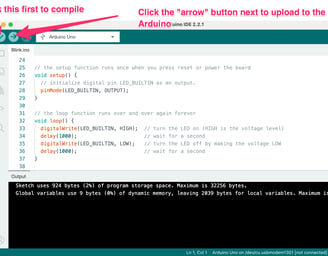
Step 4: Compile and Upload the Code to the Arduino
You want to now compile the code. Click on the "tick" button on the top left to compile. If the compilation is without errors, as it should be since you are just using one of the examples, click the "arrow" button to upload to the Arduino.
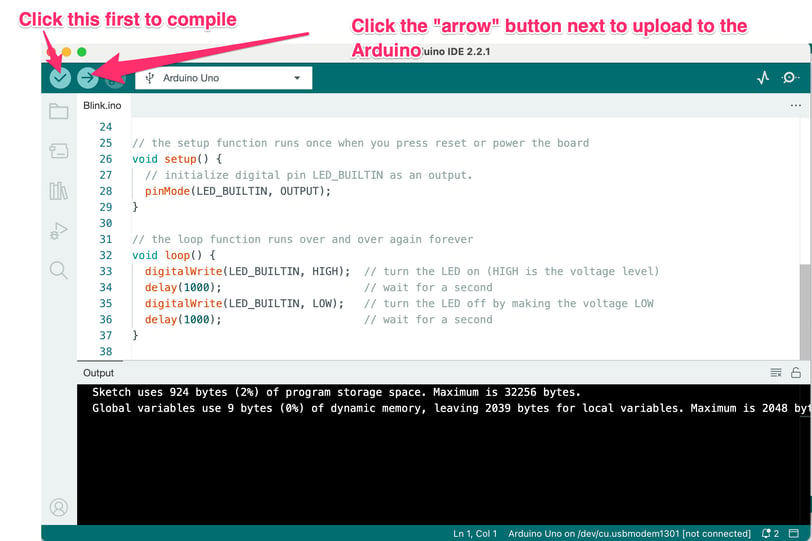
This is a snapshot of the code for the "Blink" example.
Let me quickly explain what the code does.
The pinMode() function sets the builtin LED in the Arduino (LED_BUILTIN) as the output. Since you want this code to run only once, it is best placed inside the setup().
The digitalWrite() function sets the value of the builtin LED (LED_BUILTIN) to HIGH, thus turning on the builting LED.
The next line, delay(1000), cause the Arduino to wait for 1000 milliseconds (i.e. 1 second).
You then have digitalWrite() again which sets the value of the builtin LED to LOW. In other words, the LED is turned off.
Since this block of code is inside the loop() function, it will run in a loop.
Step 3: Connect the Arduino Uno to your computer
Now connect your Arduino Uno to your Macbook using a USB cable (A plug to B plug).
You will see an LED start blinking. Now change the parameters of the delay() functions in your code. For example, you can use: delay(500). This sets the delay time to be 1/2 second. When you upload the code to the Arduino (the same way as before), you will see the LED blink at twice the rate as before.
That's it! You have successfully carried out your first experiment on the Arduino.
Step 5: Using the Arduino as a Stand-Alone
You can remove the USB cable connection with your Mac. The Arduino will get turned off since the USB cable is also being used to supply power,
There is another power jack in the Arduino which you can use to supply power to the Arduino with a 6-12 V adapter.
Try this and you will find the Arduino running like before even though it is not connected to the Mac anymore. The LED lights will blink like it did the last time. This happens because the Arduino is designed to automatically run whatever instructions was last uploaded into it as soon as it is turned on.
Step 6: Experiment # 2: Build an Ultrasonic Distance Range Finder
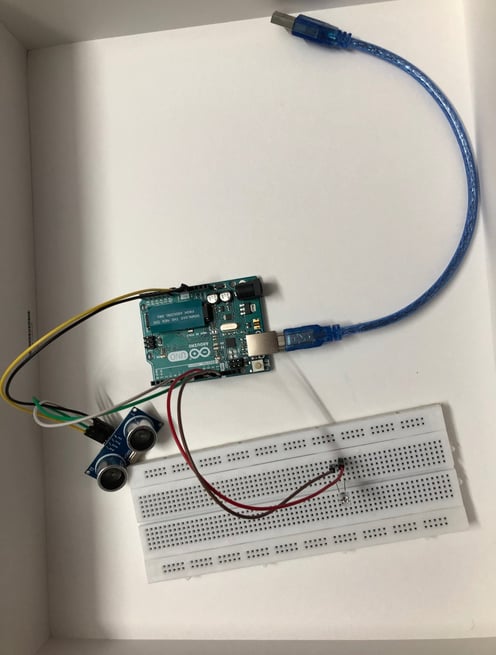
If you also have an Ultrasonic module HC-SRO4, you can turn your Arduino into an Ultrasound Ranger device in 5 minutes.
All you need is an Ultrasound HC-SRO4 module, and some jumper wires.

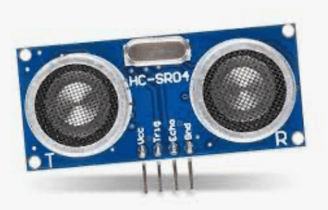
The ultrasonic module has 4 pins.
The first one, Vcc, is for supplying power.
Connect it using a female-to-male jump wire to the 5 V outlet in the Arduino.
Connect the Trig pin to Pin 7 on the right side of the Arduino.
Connect the Echo pin to Pin 8 on the right side of the Arduino.
Connect the Gnd to the Gnd outlet on the right side of the Arduino.
In your Arduino IDE, click on File -> Examples -> Sensor -> Ping.
This will load a new sketchbook.
Change the code to read like this.
const int trigPin = 7;
const int echoPin = 8;
const int ledPin = 12; // pin that the LED is attached to
const int threshold = 6; // an arbitrary threshold level that's in the range of the analog input
void setup() {
// initialize serial communication:
Serial.begin(9600);
pinMode(trigPin, OUTPUT);
pinMode(echoPin, INPUT);
pinMode(ledPin, OUTPUT);
}
void loop() {
// establish variables for duration of the ping, and the distance result
// in inches and centimeters:
long duration, inches, cm;
// The PING))) is triggered by a HIGH pulse of 2 or more microseconds.
// Give a short LOW pulse beforehand to ensure a clean HIGH pulse:
digitalWrite(trigPin, LOW);
delayMicroseconds(2);
digitalWrite(trigPin, HIGH);
delayMicroseconds(10);
digitalWrite(trigPin, LOW);
duration = pulseIn(echoPin, HIGH);
// convert the time into a distance
inches = microsecondsToInches(duration);
cm = microsecondsToCentimeters(duration);
Serial.print(inches);
Serial.print("in, ");
Serial.print(cm);
Serial.print("cm");
Serial.println();
if (inches < threshold) {
digitalWrite(ledPin, HIGH);
} else {
digitalWrite(ledPin, LOW);
}
delay(100);
}
long microsecondsToInches(long microseconds) {
// According to Parallax's datasheet for the PING))), there are 73.746
// microseconds per inch (i.e. sound travels at 1130 feet per second).
// This gives the distance travelled by the ping, outbound and return,
// so we divide by 2 to get the distance of the obstacle.
// See: https://www.parallax.com/package/ping-ultrasonic-distance-sensor-downloads/
return microseconds / 74 / 2;
}
long microsecondsToCentimeters(long microseconds) {
// The speed of sound is 340 m/s or 29 microseconds per centimeter.
// The ping travels out and back, so to find the distance of the object we
// take half of the distance travelled.
return microseconds / 29 / 2;
}
In the code, we have set the Arduino output 7 to the variable trigPin. Note that we have physically connected 7 to the trigPin of the Ultrasound sensor via a jumper wire. The same logic holds for the variable echoPin. It is set to 8 and that pin number 8 in the Arduino is connected to the echoPin of the Ulstrasound sensor.
You can find a reference list of Arduino functions in this Arduino Uno reference API page.
Now compile and upload the code as before.
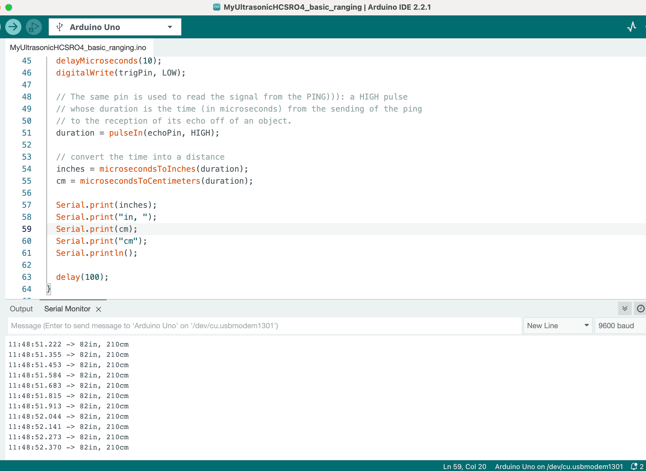
Step 7: Collect the Output Data from the Arduino
The following lines write to the Serial Monitor.:
Serial.print(inches);
Serial.print("in, ");
Serial.print(cm);
Serial.print("cm");
Serial.println();
You can open the Serial Monitor by clicking on a button on the top right open sketch of the IDE that says Serial Monitor.
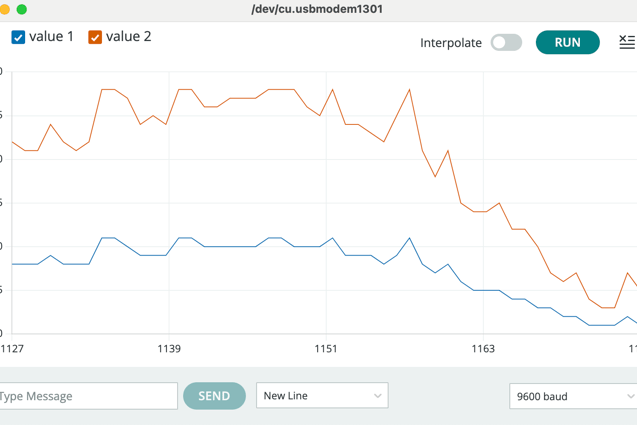
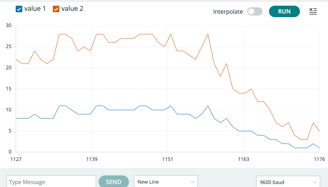
You can also see a running graph by clicking on a "curve shaped" button called Serial Plotter.
After you have uploaded the code using the upload button as before, move your hand over the ultrasound sensor.
As the distance between your hand and the ultrasound sensor changes, the distance values showing in the Serial Monitor will change. The graph on the Serial Plotter will show the same effect.
What all can you do with the Arduino?
Quite a lot actually!
Arduinos are cheap devices and you can connect them to different sensors and write devices, use them to collect data, turn switches and control machinery.
You can make a one time investment of less than $40-$50 to build a device that can be assembled in 10 minutes to watch over expensive machinery, collect data from them, or build predictive monitoring systems.
In the long run, devices like these can save you thousands of dollars in maintenance costs for expensive equipment.
Microcontrollers like the Arduino are without parallel as sensors to collect data 24/7 - generating clean data for more powerful computing systems.
If you would like some help building an AI driven system that solves the entire problem for your business, talk to us.
Click here to schedule an AI strategy call now.
You can send the data to a csv file in your computer using PuTTY, RealTerm, or CoolTerm.
You can also save the data in a microSD.